
To be precise, this is not a “Franz reviews” … rather, it’s a double test feature! The reason? Our company‘s own test bike. The idea to equip the prototype of a new frame with exquisite components and turn it into our very own test bike goes back to spring 2018. And yep, it’s been on the road again.
The frame is basically that of Radon‘s Vaillant model with a few details which were changed for the final version, e.g. the dropouts and the paint scheme. But of course, like the Vaillant frame, it is an absolute lightweight. The frame set weighs in at exactly 1263 g (size 53). However, our chosen equipment differs completely from that of a Vaillant: Apart from the Zipp components, which we already reviewed, the bike also features SRAM’s Red eTap with hydraulic disc brakes – the subject of this test! But not the only one. A Garmin Edge 1030 was used in order to test whether the data produced by the bike can actually be displayed. Our rules for using the radon test bike are: if you want to ride it, take it and ride it as far as you like – as long as it‘s for testing purposes. Among others, Guido and Franz decided to do just that.

Contents
SRAM Red eTap – on the move, electronically!
Franz: “None of us rode with eTap before, and our overall experience with electronic shifting was limited, too. Of course, we know a lot about the mechanical road bike groups, from Campagnolo’s Super Record to Shimano’s 105, Ultegra and Dura Ace and SRAM’s Red. But electronic components? No. And we‘re not afraid to admit, too, that both Guido and I belonged to the ones who kept asking themselves, if they are really necessary. After all, everything was just fine without electronics and batteries …
Naturally, we’ve already read and heard a lot about it – a lot of positive statements, but also critical voices. And you’ve actually heard of people who’ve run out of juice … but it should be common knowledge that you have to sufficiently charge this kind of electronic device, so that’s not surprising.
We chose the 2×11-speed crank in the standard setup with 53/39 teeth. For the cassette, we chose the Red XG-1190 11-speed cassette with sprockets ranging from 11 – 32 teeth. The chain of our choice is the Red 22 11-speed – i.e. the standard Red chain! But then, with the exception of the rear derailleur, the front derailleur and the shift brake levers, all of the parts we used are regular Red components.”
Guido: “The special thing about eTap is that the system doesn’t have a central battery. Each component features its own battery which supplies it with power. In any case, the bike looks much tidier without all the cables, as opposed to the competitors Di2 from Shimano or the EPS from Campagnolo. This is a clear advantage and also made the mounting process much easier.”

Mounting the SRAM Red eTap
The shifting components were mounted by Bungi, our specialist for that kind of job. Bungi: ” Completing the task was no witchcraft at all! You only have to consider three things: First, aligning the rear derailleur cage needs precision. It features two markings that have to correspond exactly with the chainring. By the way, it’s easier if done without a chain!
And second: The eTap must be “coupled“. This means that the components must be “taught” once that they belong together. Only then will they communicate properly with each other in the future. The control unit is positioned in the rear derailleur. Each component has its own button, which must be pressed. Press the button on the rear derailleur once and wait until the LED flashes green. Then proceed with the other components: Press and hold the button on the two shifting brake levers and on the front derailleur until the LED on the rear derailleur starts to blink in a faster rhythm. That’s it!
The third and last feature concerns the fine adjustment of the rear derailleur. After adjusting the end stops, position the pulley exactly under one of the sprockets. Now press the button on the back of the respective shifting lever and hold it while shifting. After that, your done!”

Our eTap impressions
Guido: “My skepticism has completely disappeared by now. To be frank, I have even become a fan of electronic shifting! My clear verdict on SRAM’s electronic road bike components: ‘The eTap makes complete sense. It’s a perfect electronic shifting system. Personally, I would prefer the eTap to a mechanical system at any time.’
Franz: “I cannot believe this shifting precision! I’ve never experienced anything like it before. You push the lever and it immediately shifts – anytime, without exception. The new shifting setup may be something you need to get used to at first, but that’s quickly done. The rear derailleur is now also operated with the left lever. On the left you shift down, on the right you shift up. To switch between the chainrings, you have to press both levers simultaneously. This works, because with two chainrings, there is only one possibility at a time.”

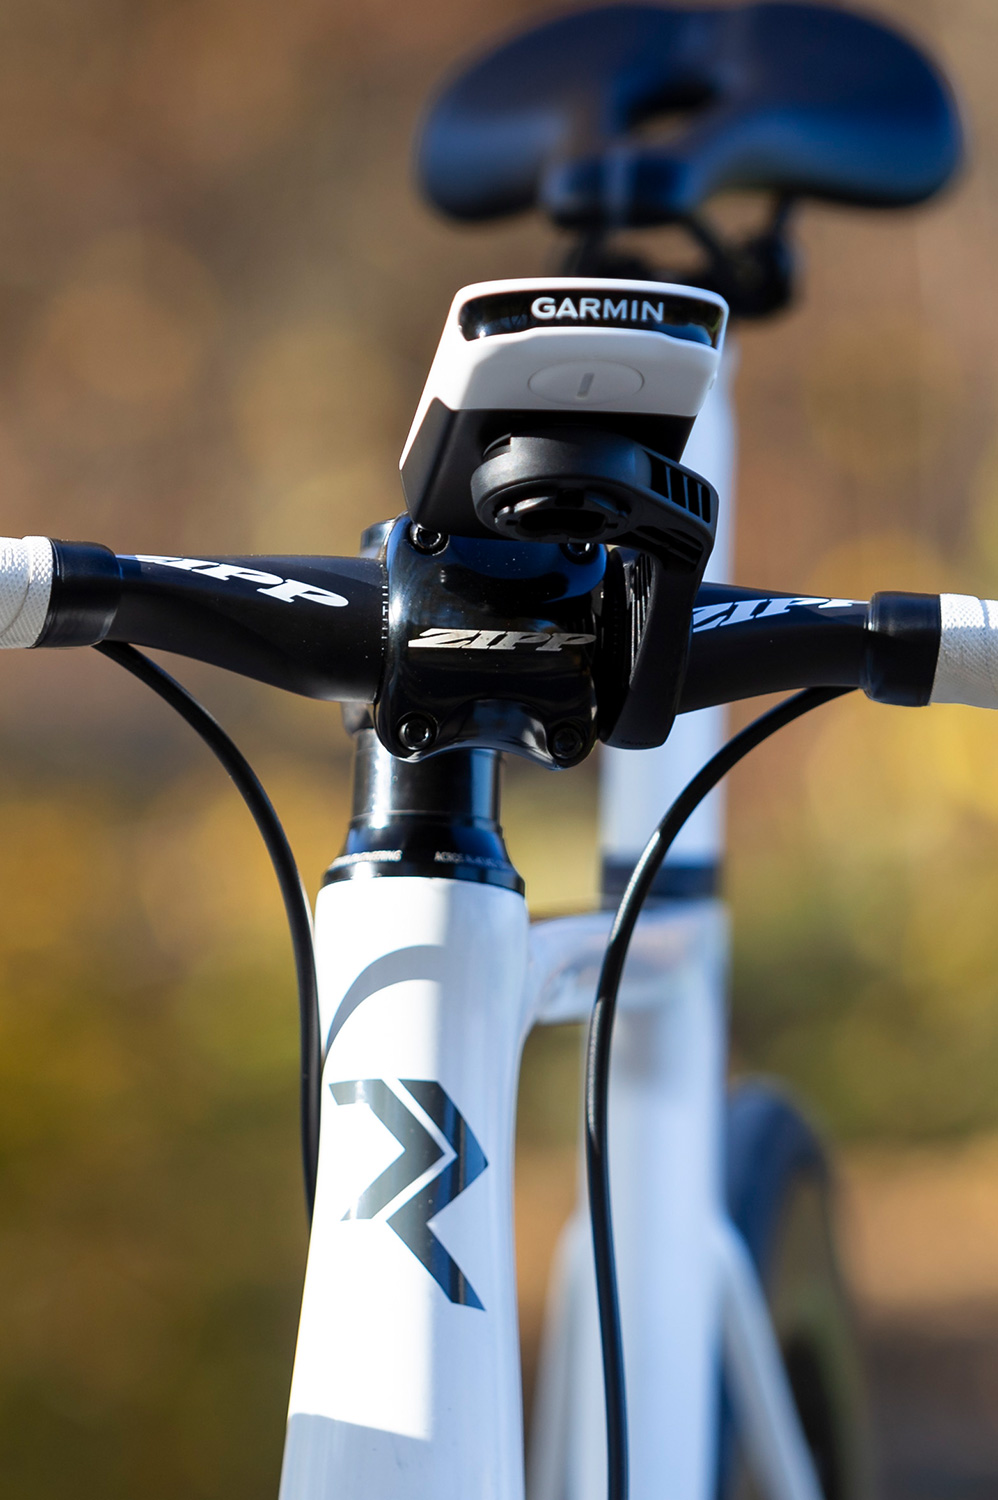
The Garmin Integration
Franz: “After attaching the 1030, the connection between the electronic components actually came automatically. The bike computer found the sensors for cadence and speed without any problems. It also recognized the eTap immediately. A look at the well-arranged sensor overview confirmed this.. Now all I had to do was to set up the display, which was no problem either. The 1030 uses an easy-to-understand bar chart to display your shifting position. In addition, it also uses numbers: 2/11 for example. That’s truly great. The only thing I have to get used to now is not looking at the rear derailleur all the time :-)”

HDR – On the road with disc brakes
We’ve equipped the bike with the eTap HDR, the version with hydraulic disc brakes. The disc brakes both have a diameter of 160 mm and provide a lot of braking power. First of all, we would like to express our general opinion on the subject of road bikes and disc brakes..
Guido: “To be honest, I used to think that no one needs disc brakes on road bikes. So I was curious what braking would feel like – especially in different weather conditions. After some rides I have changed my mind and come up with the following conclusion: Compared to rim brakes, the hydraulic disc brake is safer and you can dose the braking power much more easily. I really enjoyed the enhanced braking performance on descents. On the other hand, hydraulic disc brakes are heavier than rim brakes. And they change the look of a bike dramatically – something I still need to get used to. In addition, you have to consider the follow-up costs of hydraulic disc brakes. But since it’s for the sake of performance and safety, that’s alright. After all, it’s clearly the best braking system I have ever experienced on a road bike!”
Franz: “I had never used disc brakes on a road bike before. In fact, I didn’t know what to make of it at first, since the technical setup was new to me. But once you’ve tried it, you can enjoy a completely new braking performance. Highly precise and very reliable. Especially in wet conditions, the disc is miles ahead of the rim brake!”